Rechercher

Question
· Mai 25, 2020

The specified cast from a materialized 'System.Int64' type to the 'System.Int32' type is not valid DatabaseTable creation Id field is created with [xDBC Type = BIGINT]

Hi !

I am getting below error in my .NET MVC project, I am IRIS Entity Framwork, in the database table filed and model having the same datatype int.

The specified cast from a materialized 'System.Int64' type to the 'System.Int32' type is not valid db Table creation Id field is created with [xDBC Type = BIGINT]


Please kindly advice me.


Thank you

1 Comment
Discussion (1)0
Connectez-vous ou inscrivez-vous pour continuer
Article
· Mai 14, 2020 3m de lecture

websocket-client-js * iris-native-api * docker-micro-server

Using the IRIS native API for Node.JS was the opportunity to present
a MicroService operating in a Docker container.
A demo video is now also available to watch the demo in operation.

Instead of a utility you call directly on your IRIS host you now send a work-packages
to the MicroService as would typically do with System Interoperability (aka.ENSEMBLE):
of course, you have the option of more than one WebSocket Server.
Once the WebSocket Client Service has done its job you get back the result from it.

The advantage over the built-in WebSocket Client is, that all Network, Security,
Firewall issues are kept away from the core data server. Not to talk about the
experience and quality Node.js has in this arena.

The demo uses wss://echo.websocket.org/ as default EchoServer
Next you enter some lines of text.
At any point you can add "Lorem Ipsum" text for more content between your own text.
Next you sent it to the service and wait for the echo.
There is also the option to change your text before sending
as Exit the control program or Stop the service.

All this processing runs asynchronously.
Instead of waiting for completion, the Listener displays periodically
what was received from Echo so far.

To install it you need a

  • docker image for IRIS ( intersystems/iris-community:2020.2.0.199.0 )
  • docker image for the WebSocket MicroServer (rcemper/rcc:demoJS)
  • ################ _alternative variant since 2020-05-25 ################ just run this docker command for init
      docker run --name ini1 --init -it --rm \
        -privileged -v $(pwd):/external \
        rcemper/rcc:demoJS bash /rcc/init.sh   
    

################ the inital advise is still valid ################

To run it start IRIS first (either -d or -it to observe the behaviour) from directory demo (!)

docker run --name iris1 --init --rm -d \   
-p 52773:52773 -p 51773:51773 \   
-v $(pwd):/external \   
intersystems/iris-community:2020.2.0.199.0 \   
-b /external/pre.copy   

next start the MicroServer

docker run --name rcc1 --init -it --rm \  
rcemper/rcc:demoJS \  
/usr/bin/node \  
/rcc/nodejs/WSockIris.js \  
$(hostname -I)  

as you started it with -it you see

platform = linux: ubuntu  

    *****************************  
    Connect to IRIS on: 192.168.0.23  
Successfully connected to InterSystems IRIS.  
    *** wait 3sec for request ***  
    ******* Startup done ********  

    *** wait 3sec for request ***  
    *** wait 3sec for request ***  

then the control application in a new Linux terminal

docker exec -it iris1 iris session iris ZSocket  

and you see

*** Welcome to WebSocket Micoservice demo ***  
Known Hosts (*=Exit) [1]:  
1  wss://echo.websocket.org/  
2  --- server 2 ----  
3  --- server 3 ----  
select (1):  ==> wss://echo.websocket.org/  
#
Enter text to get echoed from WebSocketClient Service
Terminate with * at first position
or get generated text by %
or append new text with @

1    hello socket microServer
2    now you got 2 lines
3    *

Select action for WebClient Service
New EchoServer (E), Send+Listen(S),New Text(N),Exit(X), Exit+Stop Client(Z) [S]s
%%%%%%%%%%%%%%%%%%%%%%%%%%

******* 0 Replies *******

******* 2 Replies *******
1    hello socket microServer
2    now you got 2 lines


Select action for WebClient Service

and on MicroService

*** wait 3sec for request ***
echoserver:  wss://echo.websocket.org/
** Lines to process: 1 **
********* next turn *********
* WebSocket Client connected *
****** Client is ready ****** 

Line: 1 text> 'hello socket microServer '
Received: 1 > 'hello socket microServer '

Line: 2 text> 'now you got 2 lines '
Received: 2 > 'now you got 2 lines '

******* lines sent: 2 ******
*** replies received: 2 ****

*** wait 3sec for request ***

Late warning. always check the version of your image!
I just fell into  intersystems/iris-community:2020.2.0.204.0

NOTICE: ALL SCRIPTS ARE TESTED FOR LINUX ONLY !


Readme Windows

GitHub

Discussion (0)2
Connectez-vous ou inscrivez-vous pour continuer
Annonce
· Mai 12, 2020

Global Masters Gamification Hub - Start Here

Hi Community!

We're pleased to invite all DC members to the InterSystems Global Masters Gamification Platform to get points and prizes for your contribution to the Community, learn with selected content about InterSystems technology, network with your peers and have fun!


▶️  What is Global Masters?

Global Masters is a gamification platform, where you learn technology, complete tech quizzes, watch videos, etc. You will be completing challenges (tasks) related to ISC technology, earning badges & points, and exchanging points for a variety of rewards.

Each week 5-10 new challenges are issued announcing the most interesting articles on DC, best practices, videos, official InterSystems news, learning, and also fun tasks. That's a good way to stay up to date!    

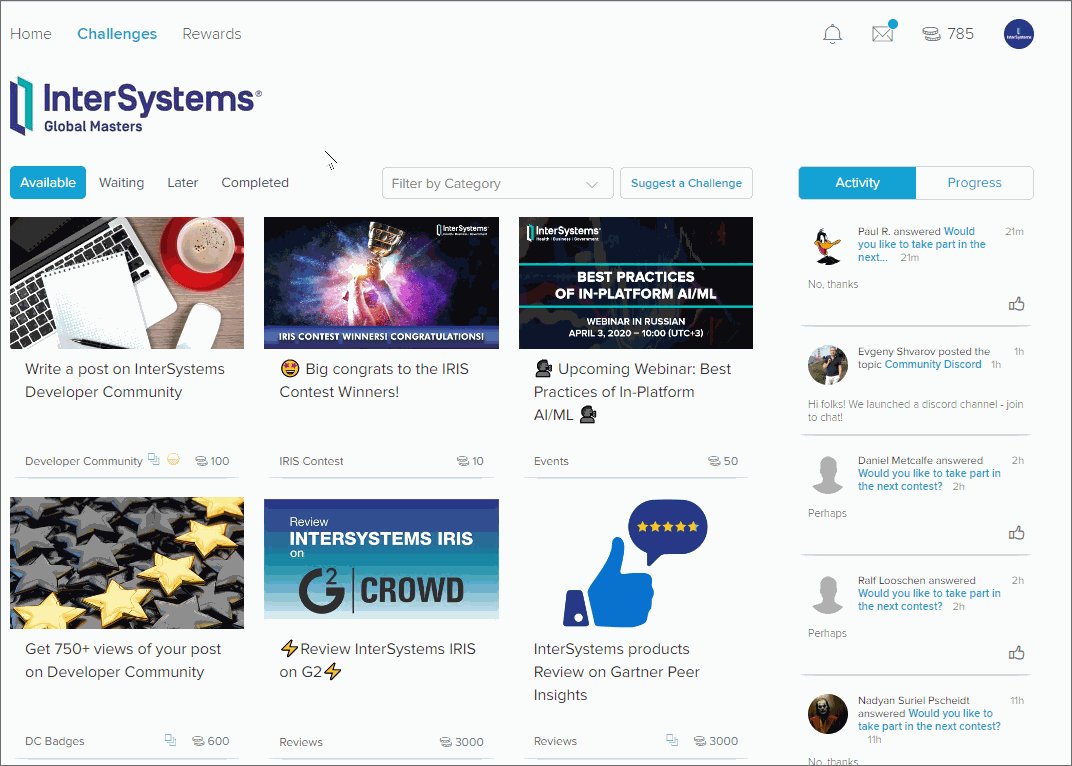
▶️  How does it look? Here's a sample of challenges and rewards:


▶️  Levels, Badges, and Privileges

There are 6 Levels in Global Masters. The higher level you are, the more valuable prizes and privileges are available for you. Contribute to Developer Community and Open Exchange, stay active on Global Masters to achieve the highest levels.

List of all levels and badges that will help you to advance to the next level.


▶️  How to Join  

  1. Go to globalmasters.intersystems.com, click on the "SIGN IN with your InterSystems login" button, and use your InterSystems SSO credentials. 
  2.  After you logged in, complete the challenge "Customize your program! START HERE!". This onboarding challenge unlocks all other challenges.


We are waiting for all InterSystems Developers in the Global MAsters Hub!

And we are very open to your feedback and ideas. Feel free to contact us at any time.

See you on InterSystems Global Masters today! 


6 Comments
Discussion (6)2
Connectez-vous ou inscrivez-vous pour continuer
Question
· Mai 7, 2020

[Fixed] How to enable the visual trace for HTTP Operation

Hi,

I have a HealthShare HealthConnect operation which uses the EnsLib.HTTP.OutboundAdapter. It is using a custom Operation class to send HTTP Post request. The request data that is sent to the operation and the response back from the operation is not  displayed on the visual trace. Is there anyway to display this data in the trace? 

Thank you for your help. 

7 Comments
Discussion (7)5
Connectez-vous ou inscrivez-vous pour continuer
Annonce
· Avr 29, 2020

ZPM and Open API Bonuses for REST API Programming Contest

Hi Developers!

As you know in the second contest we introduced technology bonuses. Learn more.

You can see what app got what bonuses in the Technology Bonuses menu:

And here I want to share with you which apps got the bonus. Here we go!

ZPM Module Bonus

To get the ZPM bonus contestants should have published a module in the community Package Manager.

Here are the projects which managed it:

Project
ZPM Command
   Production Manager    install production-manager
   JSON-Filter    install json-filter
   iris-history-monitor    install iris-history-monitor
   simple-spellchecker    install simple-spellchecker
   isc-apptools-admin    install isc-apptools-admin

ZPM gives a very handy way to install the app, e.g. all the above modules could be tested with the following 3 commands:

1. Launch IRIS:

$ docker run --name my-iris -d --publish 9091:51773 --publish 9092:52773 intersystemsdc/irishealth-community:2020.2.0.196.0-zpm

2. Open IRIS terminal and launch ZPM:

$ docker exec -it my-iris iris session IRIS

USER>zpm

zpm:USER>

3.  Install a module: 

zpm:USER>install module-name

All these projects get one export point for the ZPM implementation! Congrats!

Open API spec
To get Open API spec bonus contestants should have introduced the /_spec endpoint to their API which exposes OPEN API description of their REST API.

Here are projects which did it:

Project
Endpoint
   Production Manager    /production/_spec
   JSON-Filter    /jsonfilterrest/_spec
   REST for Tasks on my Status Report    /crud/task/_spec

All these projects get one export point for the Open API Spec! Congrats!

Open API spec can be easily read with Postman, or Swagger UI, or in IRIS, if you install swagger-ui module:

zpm:USER>install swagger-ui

And if you open:

localhost:52773/swagger-ui/index.html 

and put the URL of the spec into it, and get the following UI page, e.g. like this one:

swagger-ui

Spec-first approach

To get spec-first bonus contestants should apply an app where REST API on the IRIS side is being generated from Open API spec prepared in advance.

Nobody did this!

Nevertheless, this is a great approach to develop REST APIs! I hope you'll use it in your development!

Good luck in the voting and healthy coding!

Discussion (0)1
Connectez-vous ou inscrivez-vous pour continuer