In the previous article, we looked at one way to create a custom operator that manages the IRIS instance state. This time, we’re going to take a look at a ready-to-go operator, InterSystems Kubernetes Operator (IKO). Official documentation will help us navigate the deployment steps.
Prerequisites
To deploy IRIS, we need a Kubernetes cluster. In this example, we’ll use Google Kubernetes Engine (GKE), so we’ll need to use a Google account, set up a Google Cloud project, and install gcloud and kubectl command line utilities.
You’ll also need to install the Helm3 utility:
$ helm version
version.BuildInfo{Version:"v3.3.4"...}
Note: Be aware that on Google free tier, not all resources are free.
It doesn’t matter in our case which type of GKE we use – zonal, regional, or private. After we create one, let’s connect to the cluster. We’ve created a cluster called “iko” in a project called “iko-project”. Use your own project name in place of “iko-project” in the later text.
This command adds this cluster to our local clusters configuration:
$ gcloud container clusters get-credentials iko --zone europe-west2-b --project iko-project
Install IKO
Let’s deploy IKO into our newly-created cluster. The recommended way to install packages to Kubernetes is using Helm. IKO is not an exception and can be installed as a Helm chart. Choose Helm version 3 as it's more secure.
Download IKO from the WRC page InterSystems Components, creating a free developer account if you do not already have one. At the moment of writing, the latest version is 2.0.223.0.
Download the archive and unpack it. We will refer to the unpacked directory as the current directory.
The chart is in the chart/iris-operator directory. If you just deploy this chart, you will receive an error when describing deployed pods:
Failed to pull image "intersystems/iris-operator:2.0.0.223.0": rpc error: code = Unknown desc = Error response from daemon: pull access denied for intersystems/iris-operator, repository does not exist or may require 'docker login'.
So, you need to make an IKO image available from the Kubernetes cluster. Let’s push this image into Google Container Registry first:
$ docker load -i image/iris_operator-2.0.0.223.0-docker.tgz
$ docker tag intersystems/iris-operator:2.0.0.223.0 eu.gcr.io/iko-project/iris-operator:2.0.0.223.0
$ docker push eu.gcr.io/iko-project/iris-operator:2.0.0.223.0
After that, we need to direct IKO to use this new image. You should do this by editing the Helm values file:
$ vi chart/iris-operator/values.yaml
...
operator:
  registry: eu.gcr.io/iko-project
...
Now, we’re ready to deploy IKO into GKE:
$ helm upgrade iko chart/iris-operator --install --namespace iko --create-namespace

$ helm ls --all-namespaces --output json | jq '.[].status'
"deployed"

$ kubectl -n iko get pods # Should be Running with Readiness 1/1
Let’s look at the IKO logs:
$ kubectl -n iko logs -f --tail 100 -l app=iris-operator
…
I1212 17:10:38.119363 1 secure_serving.go:116] Serving securely on [::]:8443
I1212 17:10:38.122306 1 operator.go:77] Starting Iris operator
Custom Resource Definition irisclusters.intersystems.com was created during IKO deployment.
You can look at the API schema it supports, although it is quite long:
$ kubectl get crd irisclusters.intersystems.com -oyaml | less
One way to look at all available parameters is to use the “explain” command:
$ kubectl explain irisclusters.intersystems.com
Another way is using jq. For instance, viewing all top-level configuration settings:
$ kubectl get crd irisclusters.intersystems.com -ojson | jq '.spec.versions[].schema.openAPIV3Schema.properties.spec.properties | to_entries[] | .key'
"configSource"
"licenseKeySecret"
"passwordHash"
"serviceTemplate"
"topology"
Using jq in this way (viewing the configuration fields and their properties), we can find out the following configuration structure:
configSource
  name
licenseKeySecret
  name
passwordHash
serviceTemplate
  metadata
    annotations
  spec
    clusterIP
    externalIPs
    externalTrafficPolicy
    healthCheckNodePort
    loadBalancerIP
    loadBalancerSourceRanges
    ports
    type
topology
  arbiter
    image
    podTemplate
      controller
        annotations
      metadata
        annotations
      spec
        affinity
          nodeAffinity
            preferredDuringSchedulingIgnoredDuringExecution
            requiredDuringSchedulingIgnoredDuringExecution
          podAffinity
            preferredDuringSchedulingIgnoredDuringExecution
            requiredDuringSchedulingIgnoredDuringExecution
          podAntiAffinity
            preferredDuringSchedulingIgnoredDuringExecution
            requiredDuringSchedulingIgnoredDuringExecution
        args
        env
        imagePullSecrets
        initContainers
        lifecycle
        livenessProbe
        nodeSelector
        priority
        priorityClassName
        readinessProbe
        resources
        schedulerName
        securityContext
        serviceAccountName
        tolerations
    preferredZones
    updateStrategy
      rollingUpdate
      type
  compute
    image
    podTemplate
      controller
        annotations
      metadata
        annotations
      spec
        affinity
          nodeAffinity
            preferredDuringSchedulingIgnoredDuringExecution
            requiredDuringSchedulingIgnoredDuringExecution
          podAffinity
            preferredDuringSchedulingIgnoredDuringExecution
            requiredDuringSchedulingIgnoredDuringExecution
          podAntiAffinity
            preferredDuringSchedulingIgnoredDuringExecution
            requiredDuringSchedulingIgnoredDuringExecution
        args
        env
        imagePullSecrets
        initContainers
        lifecycle
        livenessProbe
        nodeSelector
        priority
        priorityClassName
        readinessProbe
        resources
          limits
          requests
        schedulerName
        securityContext
        serviceAccountName
        tolerations
    preferredZones
    replicas
    storage
      accessModes
      dataSource
        apiGroup
        kind
        name
      resources
        limits
        requests
      selector
      storageClassName
      volumeMode
      volumeName
    updateStrategy
      rollingUpdate
      type
  data
    image
    mirrored
    podTemplate
      controller
        annotations
      metadata
        annotations
      spec
        affinity
          nodeAffinity
            preferredDuringSchedulingIgnoredDuringExecution
            requiredDuringSchedulingIgnoredDuringExecution
          podAffinity
            preferredDuringSchedulingIgnoredDuringExecution
            requiredDuringSchedulingIgnoredDuringExecution
          podAntiAffinity
            preferredDuringSchedulingIgnoredDuringExecution
            requiredDuringSchedulingIgnoredDuringExecution
        args
        env
        imagePullSecrets
        initContainers
        lifecycle
        livenessProbe
        nodeSelector
        priority
        priorityClassName
        readinessProbe
        resources
          limits
          requests
        schedulerName
        securityContext
        serviceAccountName
        tolerations
    preferredZones
    shards
    storage
      accessModes
      dataSource
        apiGroup
        kind
        name
      resources
        limits
        requests
      selector
      storageClassName
      volumeMode
      volumeName
    updateStrategy
      rollingUpdate
      type
There are so many settings, but, you don’t need to set them all. The defaults are suitable. You can see examples of configuration in the file iris_operator-2.0.0.223.0/samples.
To run a minimal viable IRIS, we need to specify only a few settings, like IRIS (or IRIS-based application) version, storage size, and license key.
Note about license key: we’ll use a community IRIS, so we don’t need a key. We cannot just omit this setting, but can create a secret containing a pseudo-license. License secret generation is simple:
$ touch iris.key # remember that a real license file is used in the most cases
$ kubectl create secret generic iris-license --from-file=iris.key
An IRIS description understandable by IKO is:
$ cat iko.yaml
apiVersion: intersystems.com/v1alpha1
kind: IrisCluster
metadata:
  name: iko-test
spec:
  passwordHash: '' # use a default password SYS
  licenseKeySecret:
    name: iris-license # use a Secret name bolded above
  topology:
    data:
      image: intersystemsdc/iris-community:2020.4.0.524.0-zpm # Take a community IRIS
      storage:
        resources:
          requests:
            storage: 10Gi
Send this manifest into the cluster:
$ kubectl apply -f iko.yaml

$ kubectl get iriscluster
NAME       DATA COMPUTE MIRRORED STATUS   AGE
iko-test 1                       Creating 76s

$ kubectl -n iko logs -f --tail 100 -l app=iris-operator
db.Spec.Topology.Data.Shards = 0
I1219 15:55:57.989032 1 iriscluster.go:39] Sync/Add/Update for IrisCluster default/iko-test
I1219 15:55:58.016618 1 service.go:19] Creating Service default/iris-svc.
I1219 15:55:58.051228 1 service.go:19] Creating Service default/iko-test.
I1219 15:55:58.216363 1 statefulset.go:22] Creating StatefulSet default/iko-test-data.
We see that some resources (Service, StatefulSet) are going to be created in a cluster in the “default” namespace.
In a few seconds, you should see an IRIS pod in the “default” namespace:
$ kubectl get po -w
NAME            READY STATUS             RESTARTS AGE
iko-test-data-0 0/1   ContainerCreating  0        2m10s
Wait a little until the IRIS image is pulled, that is, until Status becomes Ready and Ready becomes 1/1. You can check what type of disk was created:
$ kubectl get pv
NAME                                     CAPACITY ACCESS MODES  RECLAIM POLICY STATUS CLAIM STORAGECLASS REASON AGE
pvc-b356a943-219e-4685-9140-d911dea4c106 10Gi     RWO    Delete Bound   default/iris-data-iko-test-data-0 standard 5m
Reclaim policy “Delete” means that when you remove Persistent Volume, GCE persistent disk will be also removed. There is another policy, “Retain”, that allows you to save Google persistent disks to survive Kubernetes Persistent Volumes deletion. You can define a custom StorageClass to use this policy and other non-default settings. An example is present in IKO’s documentation: Create a storage class for persistent storage.
Now, let’s check our newly created IRIS. In general, traffic to pods goes through Services or Ingresses. By default, IKO creates a service of ClusterIP type with a name from the iko.yaml metadata.name field:
$ kubectl get svc iko-test
NAME     TYPE      CLUSTER-IP EXTERNAL-IP PORT(S)             AGE
iko-test ClusterIP 10.40.6.33 <none>      1972/TCP,52773/TCP  14m
We can call this service using port-forward:
$ kubectl port-forward svc/iko-test 52773
Navigate a browser to http://localhost:52773/csp/sys/UtilHome.csp and type _system/SYS.
You should see a familiar IRIS user interface (UI).
Custom Application
Let’s replace a pure IRIS with an IRIS-based application. First, download the COVID-19 application. We won’t consider a complete, continuous deployment here, just minimal steps:
$ git clone https://github.com/intersystems-community/covid-19.git
$ cd covid-19
$ docker build --no-cache -t covid-19:v1 .
As our Kubernetes is running in a Google cloud, let’s use Google Docker Container Registry as an image storage. We assume here that you have an account in Google Cloud allowing you to push images. Use your own project name in the below-mentioned commands:
$ docker tag covid-19:v1 eu.gcr.io/iko-project/covid-19:v1
$ docker push eu.gcr.io/iko-project/covid-19:v1
Let’s go to the directory with iko.yaml, change the image there, and redeploy it. You should consider removing the previous example first:
$ cat iko.yaml
...
  data:
    image: eu.gcr.io/iko-project/covid-19:v1
...
$ kubectl delete -f iko.yaml
$ kubectl -n iko delete deploy -l app=iris-operator
$ kubectl delete pvc iris-data-iko-test-data-0
$ kubectl apply -f iko.yaml
You should recreate the IRIS pod with this new image.
This time, let’s provide external access via Ingress Resource. To make it work, we should deploy an Ingress Controller (choose nginx for its flexibility). To provide a traffic encryption (TLS), we will also add yet another component – cert-manager.
To install both these components, we use a Helm tool, version 3.
$ helm repo add ingress-nginx https://kubernetes.github.io/ingress-nginx

$ helm upgrade nginx-ingress  \
  --namespace nginx-ingress   \
  ingress-nginx/ingress-nginx \
  --install                   \
  --atomic                    \
  --version 3.7.0             \
  --create-namespace
Look at an nginx service IP (it’s dynamic, but you can make it static):
$ kubectl -n nginx-ingress get svc
NAME                                   TYPE         CLUSTER-IP   EXTERNAL-IP PORT(S) AGE
nginx-ingress-ingress-nginx-controller LoadBalancer 10.40.0.103  xx.xx.xx.xx 80:32032/TCP,443:32374/TCP 88s
Note: your IP will differ.
Go to your domain registrar and create a domain name for this IP. For instance, create an A-record:
covid19.myardyas.club = xx.xx.xx.xx
Some time will pass until this new record propagates across DNS servers. The end result should be similar to:
$ dig +short covid19.myardyas.club
xx.xx.xx.xx
Having deployed Ingress Controller, we now need to create an Ingress resource itself (use your own domain name):
$ cat ingress.yaml
apiVersion: extensions/v1beta1
kind: Ingress
metadata:
  name: iko-test
  annotations:
    kubernetes.io/ingress.class: nginx
    nginx.ingress.kubernetes.io/use-regex: "true"
    nginx.ingress.kubernetes.io/ssl-redirect: "true"
    certmanager.k8s.io/cluster-issuer: lets-encrypt-production # Cert manager will be deployed below
spec:
  rules:
  - host: covid19.myardyas.club
    http:
      paths:
      - backend:
          serviceName: iko-test
          servicePort: 52773
        path: /
  tls:
  - hosts:
    - covid19.myardyas.club
    secretName: covid19.myardyas.club

$ kubectl apply -f ingress.yaml
After a minute or so, IRIS should be available at http://covid19.myardyas.club/csp/sys/UtilHome.csp (remember to use your domain name) and the COVID-19 application at http://covid19.myardyas.club/dsw/index.html (choose namespace IRISAPP).
Note: Above, we’ve exposed the HTTP IRIS port. If you need to expose via nginx TCP super-server port (1972 or 51773), you can read instructions at Exposing TCP and UDP services.
Add Traffic Encryption
The last step is to add traffic encryption. Let’s deploy cert-manager for that:
$ kubectl apply -f https://raw.githubusercontent.com/jetstack/cert-manager/v0.10.0/deploy/manifests/00-crds.yaml
$ helm upgrade cert-manager \
  --namespace cert-manager  \
  jetstack/cert-manager     \
  --install                 \
  --atomic                  \
  --version v0.10.0         \
  --create-namespace
$ cat lets-encrypt-production.yaml
apiVersion: certmanager.k8s.io/v1alpha1
kind: ClusterIssuer
metadata:
  name: lets-encrypt-production
spec:
  acme:
    # Set your email. Let’s Encrypt will send notifications about certificates expiration
    email: mvhoma@gmail.com
    server: https://acme-v02.api.letsencrypt.org/directory
    privateKeySecretRef:
      name: lets-encrypt-production
    solvers:
    - http01:
        ingress:
          class: nginx
$ kubectl apply -f lets-encrypt-production.yaml
Wait a few minutes until cert-manager notices IRIS-application ingress and goes to Let’s Encrypt for a certificate. You can observe Order and Certificate resources in progress:
$ kubectl get order
NAME                             STATE AGE
covid19.myardyas.club-3970469834 valid 52s
$ kubectl get certificate
NAME                  READY SECRET                AGE
covid19.myardyas.club True  covid19.myardyas.club 73s
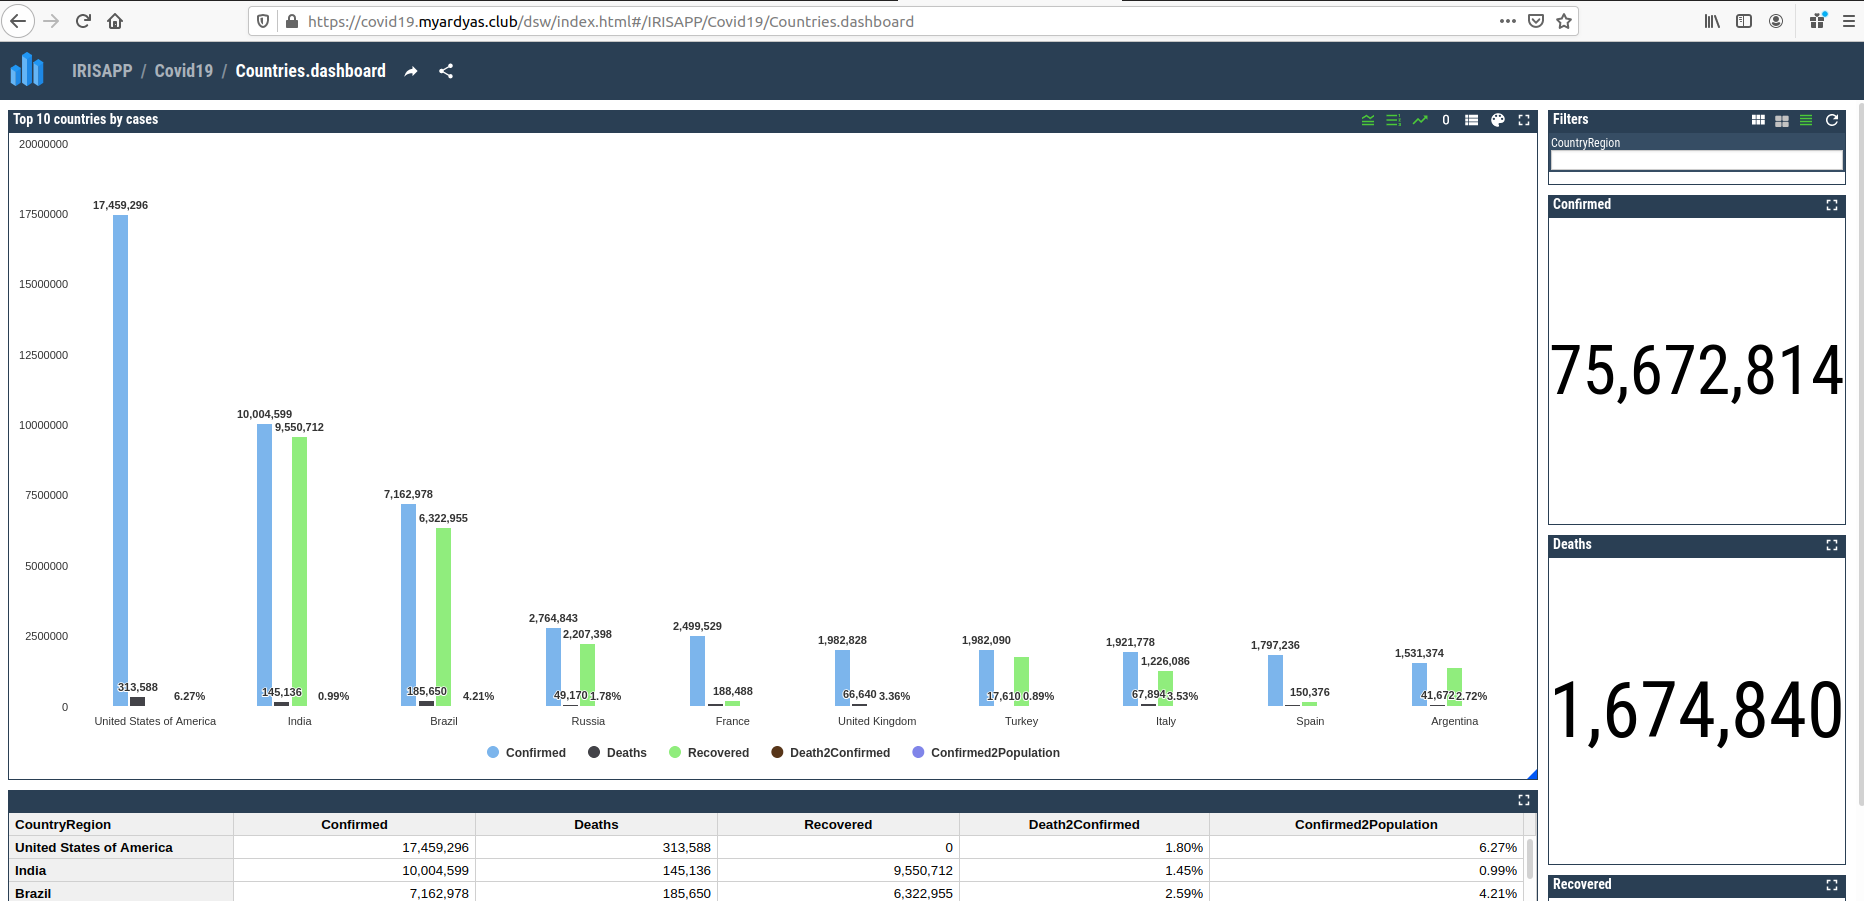
This time, you can visit a more secured site version - https://covid19.myardyas.club/dsw/index.html:
About Native Google Ingress Controller and Managed Certificates
Google supports its own ingress controller, GCE, which you can use in place of an nginx controller. However, it has some drawbacks, for instance, lack of rewrite rules support, at least at the moment of writing.
Also, you can use Google managed certificates in place of cert-manager. It’s handy, but initial retrieval of certificate and any updates of Ingress resources (like new path) causes a tangible downtime. Also, Google managed certificates work only with GCE, not with nginx, as noted in Managed Certificates.
Next Steps
We’ve deployed an IRIS-based application into the GKE cluster. To expose it to the Internet, we’ve added Ingress Controller and a certification manager. We’ve tried the IrisCluster configuration to highlight that setting up IKO is simple. You can read about more settings in Using the InterSystems Kubernetes Operator documentation.
A single data server is good, but the real fun begins when we add ECP, mirroring, and monitoring, which are also available with IKO. Stay tuned and read the upcoming article in our Kubernetes operator series to take a closer look at mirroring.
 Open Exchange